Every Minnesota winter, the same ridge of ice shows up at the edge of thousands of roofs. It looks like a minor nuisance. It is one of the most common causes of interior water damage in community associations, and it is almost always a sign of a problem inside the building, not outside it. This page explains what an ice dam is, how to recognize one early, and what a board should do about it.
What an ice dam is
An ice dam is a ridge of ice that forms at the edge of a roof and blocks melting snow from draining off. The water that backs up behind that ridge has nowhere to go, so it works its way under the shingles and into the building, where it can damage ceilings, walls, insulation, and finishes.
The important thing to understand is that an ice dam is a heat problem, not a snow problem. It forms when three conditions line up at the same time: snow sitting on the roof, an upper roof surface that is above 32 degrees, and a lower roof surface (the eave, the roof edge that hangs past the exterior wall) that is below 32 degrees. Heat escaping from the living space warms the upper roof and melts the snow resting on it. That meltwater runs down the roof until it reaches the cold eave, where it refreezes. Over hours and days, that refrozen water builds into a dam.
According to the University of Minnesota Extension, an ice dam can begin forming with as little as two inches of snow on the roof, and snowfalls of six inches or more create the greatest risk.
See the University of Minnesota Extension's ice dam formation diagram (Opens in a new tab)Credit: University of Minnesota Extension.
How to recognize one
Ice dams are easy to spot once you know the signs. Walk the property after a significant snowfall or a stretch of freeze and thaw, and look for:
- A thick band of ice sitting along the roof edge or in the gutters, often with a visible lip.
- Rows of icicles hanging from the eaves, the gutters, or the soffit (the underside panel where the roof overhangs the wall). Icicles alone do not confirm a dam, but they are a reliable warning that heat is escaping and meltwater is refreezing at the edge.
- Water stains, discoloration, or peeling paint on interior ceilings and walls, especially along the outside edges of top-floor units.
- Damp or stained insulation in attic spaces.
- Moisture, condensation, or frost on the inside of top-floor windows near exterior walls.
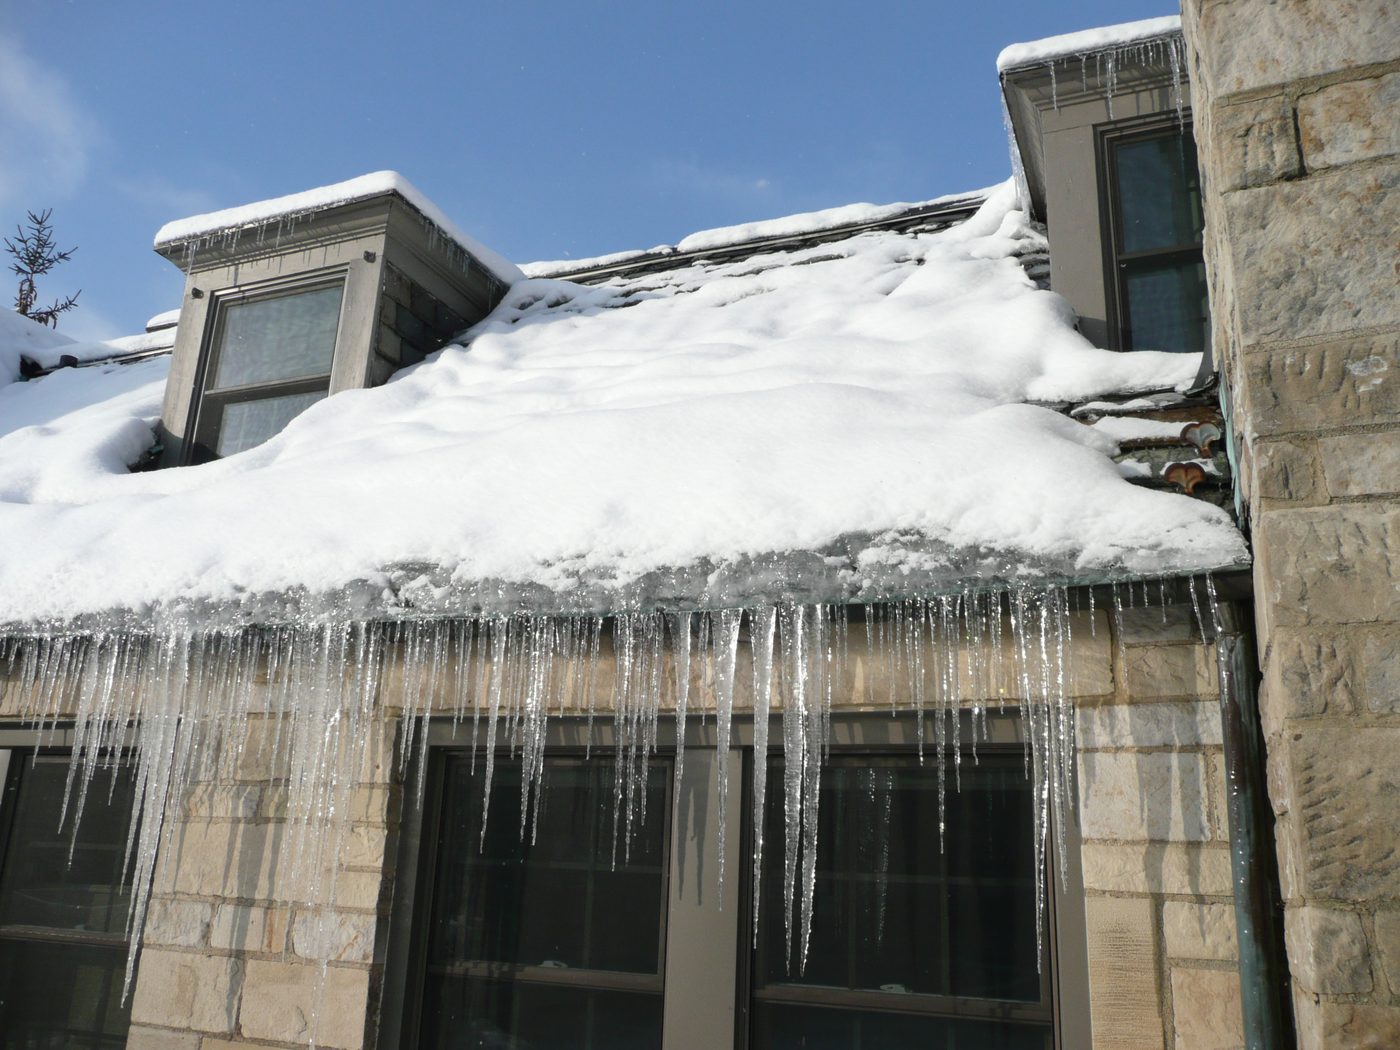
Catching these early matters. The damage from an ice dam usually shows up inside the building well before anyone connects it to the ice outside.
What it means for your association
For a community association, ice dams carry three practical concerns.
Shared and adjacent roofs spread the risk. In townhome and multi-unit buildings, one warm attic or one poorly sealed unit can produce a dam that sends water into a neighboring unit. The cause and the damage often sit under different roofs, which makes ice dams a building-wide maintenance question, not a single-owner one.
Document what you see. If water intrusion appears, record it. Photograph the ice, the icicles, and every interior stain, note the date and the unit or location, and give that record to your management company and board. A clear, dated record protects the association and gives your professionals and your insurer accurate information to work from.
Keep people off the roof. Getting up on a snow-covered roof, or chipping at ice with tools, is dangerous and can damage shingles and gutters. The University of Minnesota Extension is direct about this: roof work in winter risks serious injury and property damage and should be left to professionals.
Why ice dams form, and how to actually fix them
Because an ice dam is a heat problem, removing the ice only treats the symptom. The ice comes back next storm unless the underlying heat loss is corrected.
The University of Minnesota Extension lays out the long-term fix as a hierarchy, in this order:
- Air sealing first. Air sealing means closing the gaps and cracks in the ceiling (around light fixtures, hatches, plumbing, and wiring) where warm indoor air leaks up into the attic. This is the highest-priority step, because escaping air carries the most heat.
- Insulation second. Adequate attic insulation keeps heat in the living space instead of letting it warm the roof deck. Insulation is measured in R-value, a rating of how well a material resists heat flow (higher is better). Minnesota's energy code sets a minimum ceiling insulation of R-49 for our climate zones, among the highest requirements in the country, and many building-science specialists recommend going above the minimum for effective ice dam prevention. Wet insulation permanently loses much of its R-value, so a past leak can quietly make the next dam worse.
- Ventilation third. Good attic ventilation, balanced intake at the soffit and exhaust at the ridge, keeps the roof surface uniformly cold so snow does not melt unevenly in the first place.
A qualified weatherization contractor can find the source of the heat loss using a blower door test (a fan that measures how airtight the ceiling is) and an infrared camera that shows where heat is escaping. Interior repairs should wait until the leak has dried out and the heat-loss cause is corrected, or the same damage will happen again.
If a dam is already causing damage
When an active ice dam is already leaking, the goal is to open a drainage channel and remove the ice without harming the roof. Professional steam removal is the method endorsed by building-science authorities and the National Roofing Contractors Association, because low-pressure steam melts the ice without the gouging that picks, hammers, and pressure washers cause.
A roof rake used carefully from the ground can reduce snow load after a storm and lower the risk, but even careful raking can damage roofing, and no one should climb onto the roof to do it.
When evaluating any provider, a board can ask about the removal method (steam versus mechanical), proof of insurance, and experience with the building type. The method matters more than the marketing.
Take the next step
If your buildings have a history of winter leaks, icicles along the eaves, or stained top-floor ceilings, the productive move is to find the heat-loss source before the next snowfall, not after. A baseline attic-and-roof assessment identifies where warm air is escaping and what it will take to correct it.
Request a baseline inspection, or download the Winter Roof Checklist for a walk-the-property guide your board can use each season.
Sources and further reading
- University of Minnesota Extension, "Dealing with and preventing ice dams": extension.umn.edu (Opens in a new tab)
- U.S. Department of Energy, home insulation and air sealing guidance: energy.gov/energysaver/weatherize (Opens in a new tab)
- National Roofing Contractors Association: nrca.net (Opens in a new tab)
- Minnesota residential energy code (ceiling insulation requirements), via UpCodes: up.codes (Opens in a new tab)